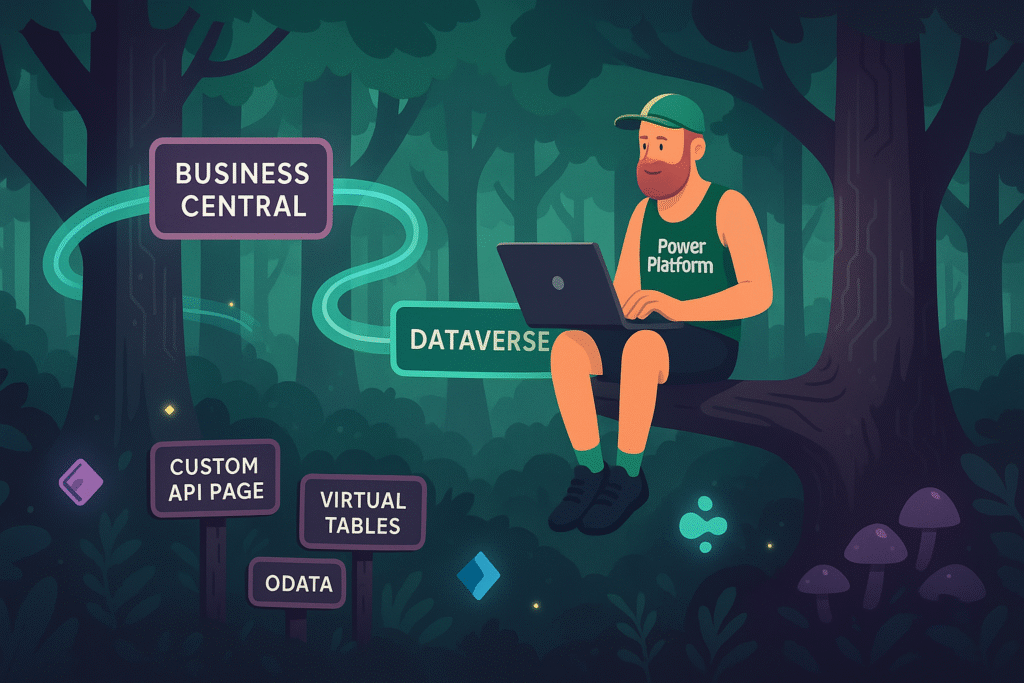
If you have been following this series, you know that in part one I explained the business value of integrating Business Central (BC) with Dataverse using virtual tables. In part two we took a look at how the integration works, what it supports, and what to watch out for.
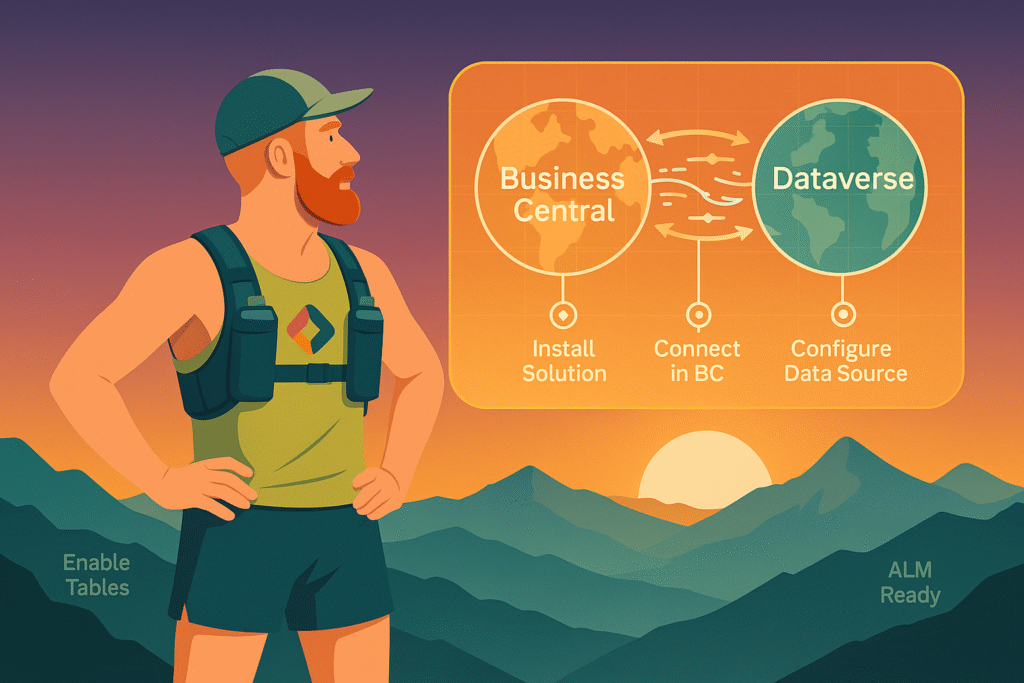
Now it is time to do some actual work and get hands-on. In this post I will go through the setup process step-by-step and share some tips on how to handle this integration in an ALM context. By the end, you should be ready to bring BC data into Dataverse in a structured, repeatable, and maintainable way.
Prerequisites
Before starting, make sure you have:
- BC Online version 17 or later
- Microsoft Dataverse service update 189 or later
- Both environments in the same tenant
- Admin access to both BC and Dataverse
- An ALM process (Power Platform Pipelines or Azure DevOps recommended)
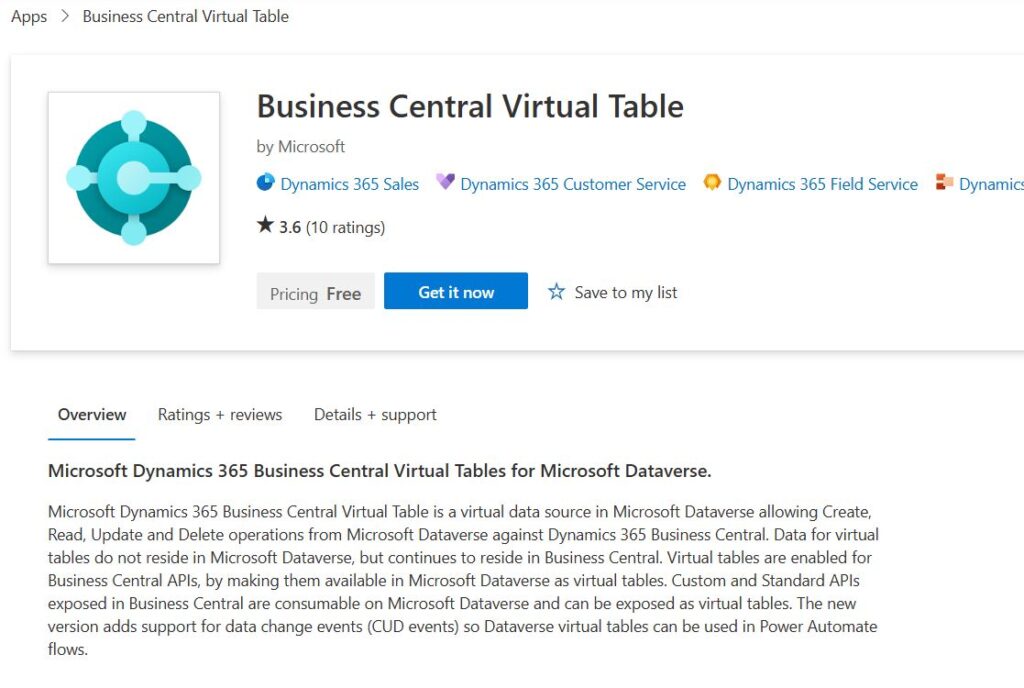
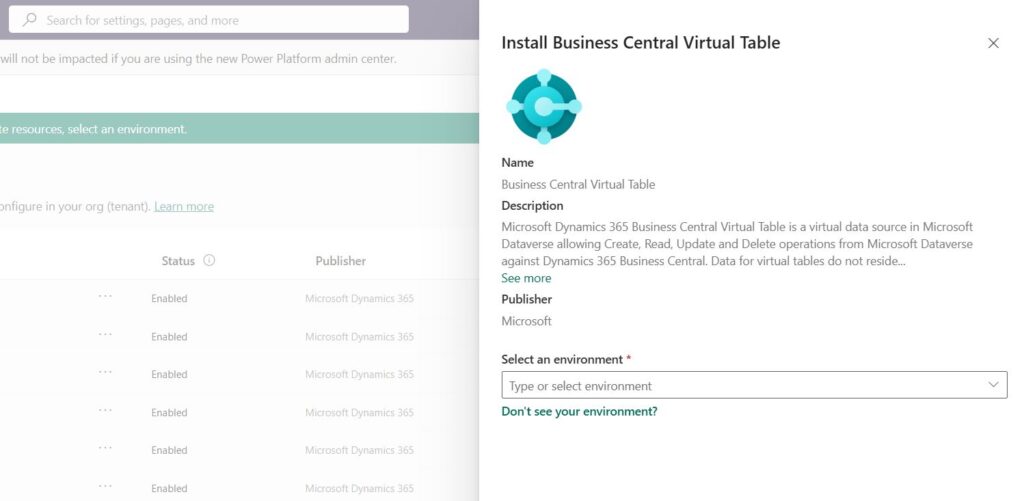
Step 1: Install the Business Central Virtual Entity Solution
Do this in each Dataverse environment you want to connect to BC.
The virtual table feature is not built in by default. You need to install it from AppSource.
- Open the AppSource listing for Business Central Virtual Entity and click Get it now.
- You will be redirected to the Power Platform Admin Center.
- In the Select an environment dropdown, choose the Dataverse environment where you want the solution installed.
- Click Install and confirm.
This installs all required components, including:
- Dynamics365Company – Adds the
cdm_companytable used by all BC virtual tables - MicrosoftBusinessCentralVESupport – Core support for the feature
- MicrosoftBusinessCentralERPCatalog – Catalog of available BC tables, including custom API-based ones
- MicrosoftBusinessCentralVEAnchor – Container for AppSource info
- MicrosoftBusinessCentralERPVE – The generated virtual tables themselves
Step 2: Set Up the Connection in Business Central
Do this in each BC environment and pair it with the matching Dataverse environment.
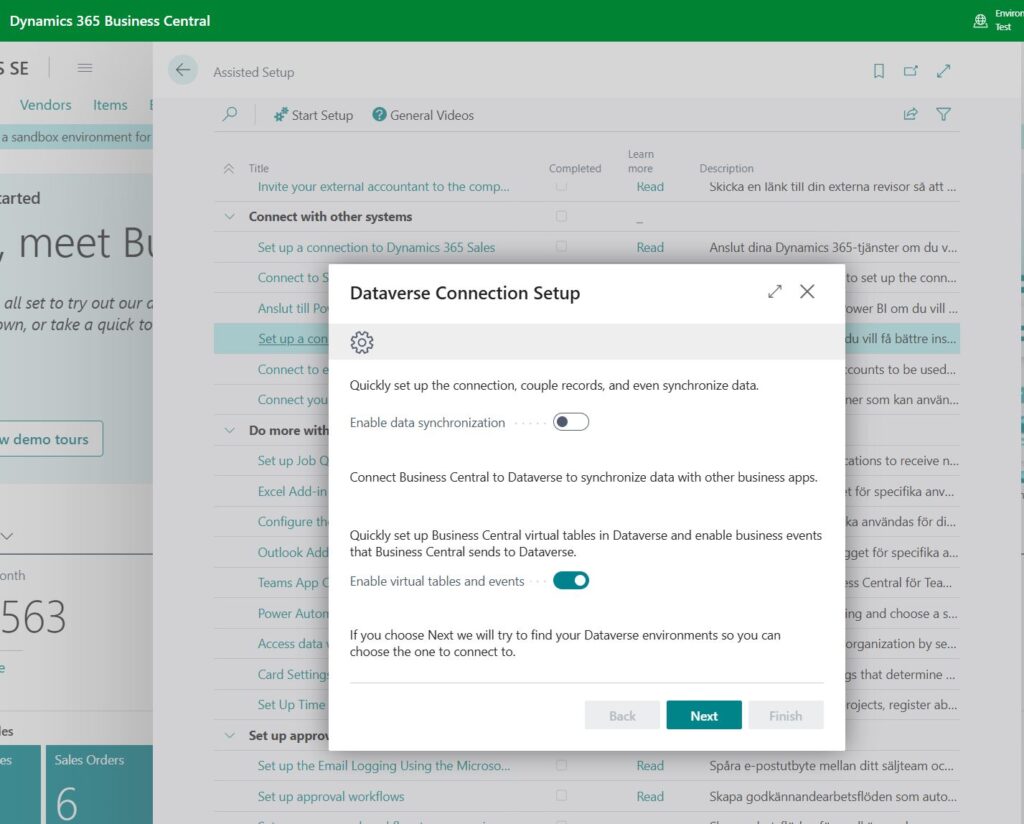
- In BC, search for Assisted Setup.
- Select Set up a connection to Dataverse and click Start.
- Follow the wizard to sign in with your Dataverse admin account.
- Select the Dataverse environment you installed the solution into in Step 1.
- Complete the wizard. This will enable the Dynamics 365 Business Central for Virtual Tables app for that BC–Dataverse pairing.

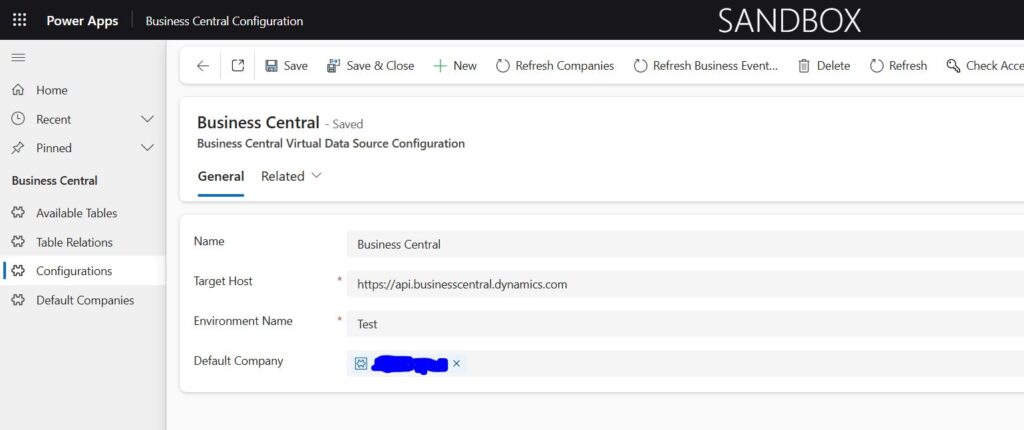
Step 3: Configure the BC Virtual Data Source in Dataverse
Do this in each Dataverse environment you want to connect to BC.
- In the Power Apps maker portal, switch to the Dataverse environment you want to configure.
- Open the app named Business Central Configuration.
- From the left-hand menu, select Configuration.
- Locate and open the record named Business Central.
- In Environment Name, enter your BC environment name (default is
productionunless renamed). - Click Save.
- Set the Default Company value.
- Click Save again.
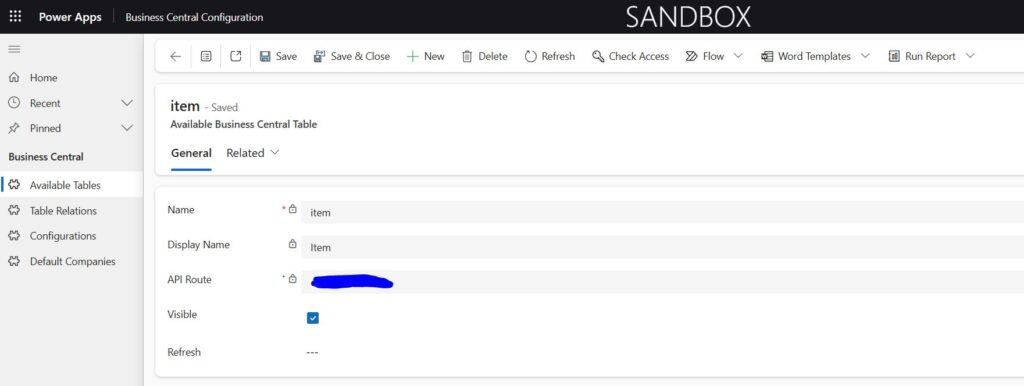
Step 4: Make BC Tables Visible as Virtual Tables
By default, no BC tables are visible in Dataverse to avoid clutter. You enable them individually.
- In the Business Central Configuration app, go to Available Tables in the left-hand menu.
Alternatively: In Dataverse, go to Data → Tables and search for Available Business Central Table. - Open the BC table you want to expose.
- Set Visible to Checked.
- Click Save.
This generates the virtual table in the MicrosoftBusinessCentralERPVE solution.

Step 5: Refresh Metadata if Needed
If you have added or changed fields in BC:
- Open the relevant Available Business Central Table record.
- Set Refresh to Checked.
- Click Save.
Dataverse will now pull the latest schema from BC.
Step 6: Use the Virtual Tables in Your Solutions
- Create or open your Dataverse solution.
- Click Add existing → Table.
- Select the BC virtual table you made visible.
- Select any forms, views, or other elements to customize.
- Click Finish and build your logic as usual.
ALM Considerations
When working with Business Central virtual tables, it is important to remember that they live inside a managed solution called MicrosoftBusinessCentralERPVE. You do not directly export or move these tables between environments. Instead, you reference them in your own unmanaged or managed solutions using the “Add Existing” option. This way your solution knows which virtual tables it depends on, and Dataverse will automatically check for them during import. If the target environment does not already have a specific table visible, it will be enabled automatically during the import process.
Connections and environment-specific settings, such as the environment name and default company in the BC Virtual Data Source Configuration, do not travel with the solution. You need to configure these manually in each environment before deployment so that your solution imports cleanly and the data connections work immediately.
The best practice is to prepare and configure each target environment ahead of time, making sure the virtual tables are installed, the data source settings are in place, and the required BC–Dataverse connection is active. Once that is done, you can move your solution through the pipeline and expect it to connect without further manual intervention.
Real-World Tips
Start with just the BC tables you need and avoid enabling everything at once. Document which BC APIs and custom API pages are exposed. Whenever possible, use a custom API page in Business Central instead of the standard API. This gives you control over the schema and makes it much easier to add columns or adjust the structure later in the process without breaking existing integrations. Assign shared ownership between BC admins and Power Platform admins. Test security and performance before rollout. Most importantly, remember that Steps 1, 2, and 3 must be completed for every BC–Dataverse environment pairing. These are not one-time global settings.
Conclusion
Once you know where to click, setting up BC virtual tables is straightforward. The payoff is huge, giving you real-time access to BC data in Dataverse without messy sync jobs.
With the steps in this post, you can configure, enable, and use BC virtual tables while keeping ALM in mind for long-term maintainability.